Breathing Life into an 80-Year-Old Maple Wood Floor

There’s something uniquely satisfying about bringing a neglected piece of history back to its former glory. My latest project was nothing short of an adventure—refinishing a maple wood floor that hadn't been cared for since its first finish over 80 years ago. Once darkened, worn, and unrecognizable, this beautiful wood had all but lost its charm. But with patience, determination, and a lot of sanding, I uncovered its stunning golden tones and gave it a second life. Here's how it all unfolded.
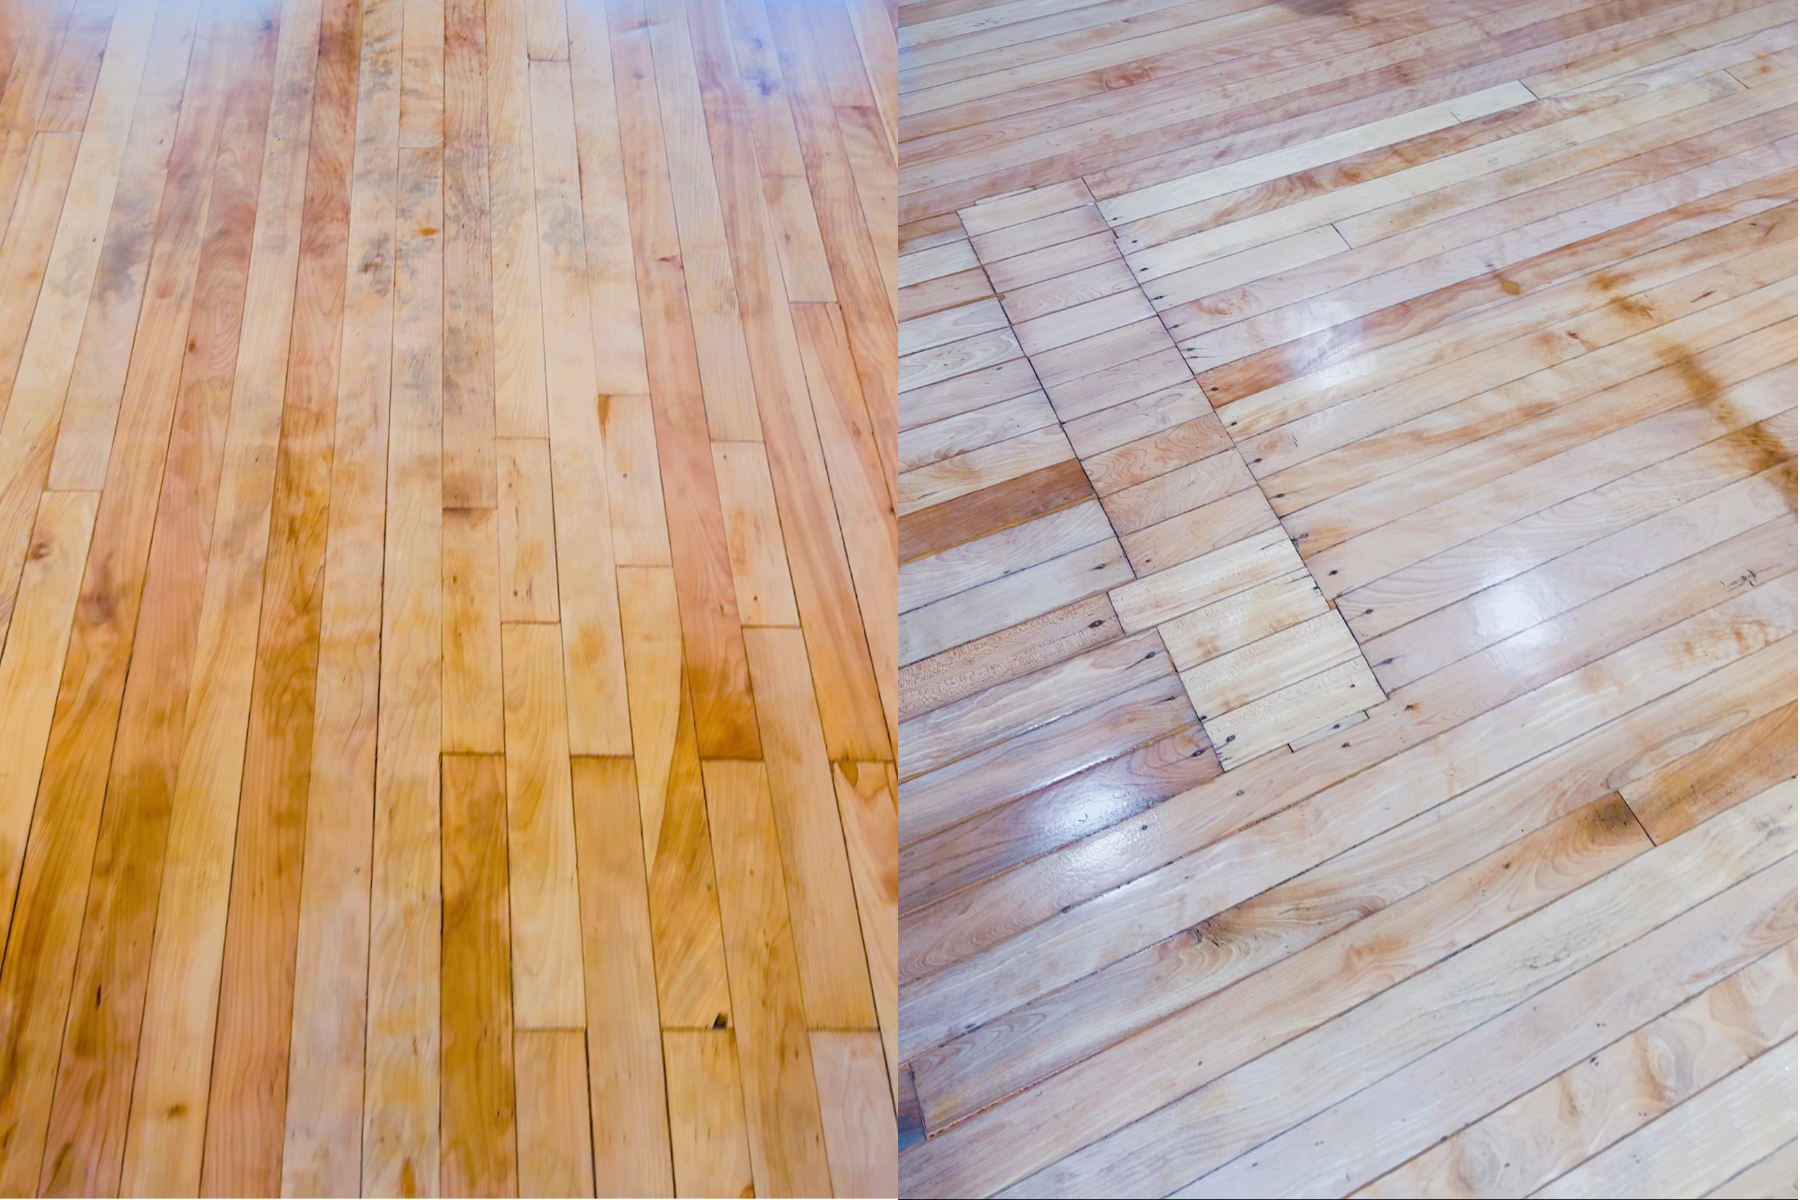
The Initial Challenge
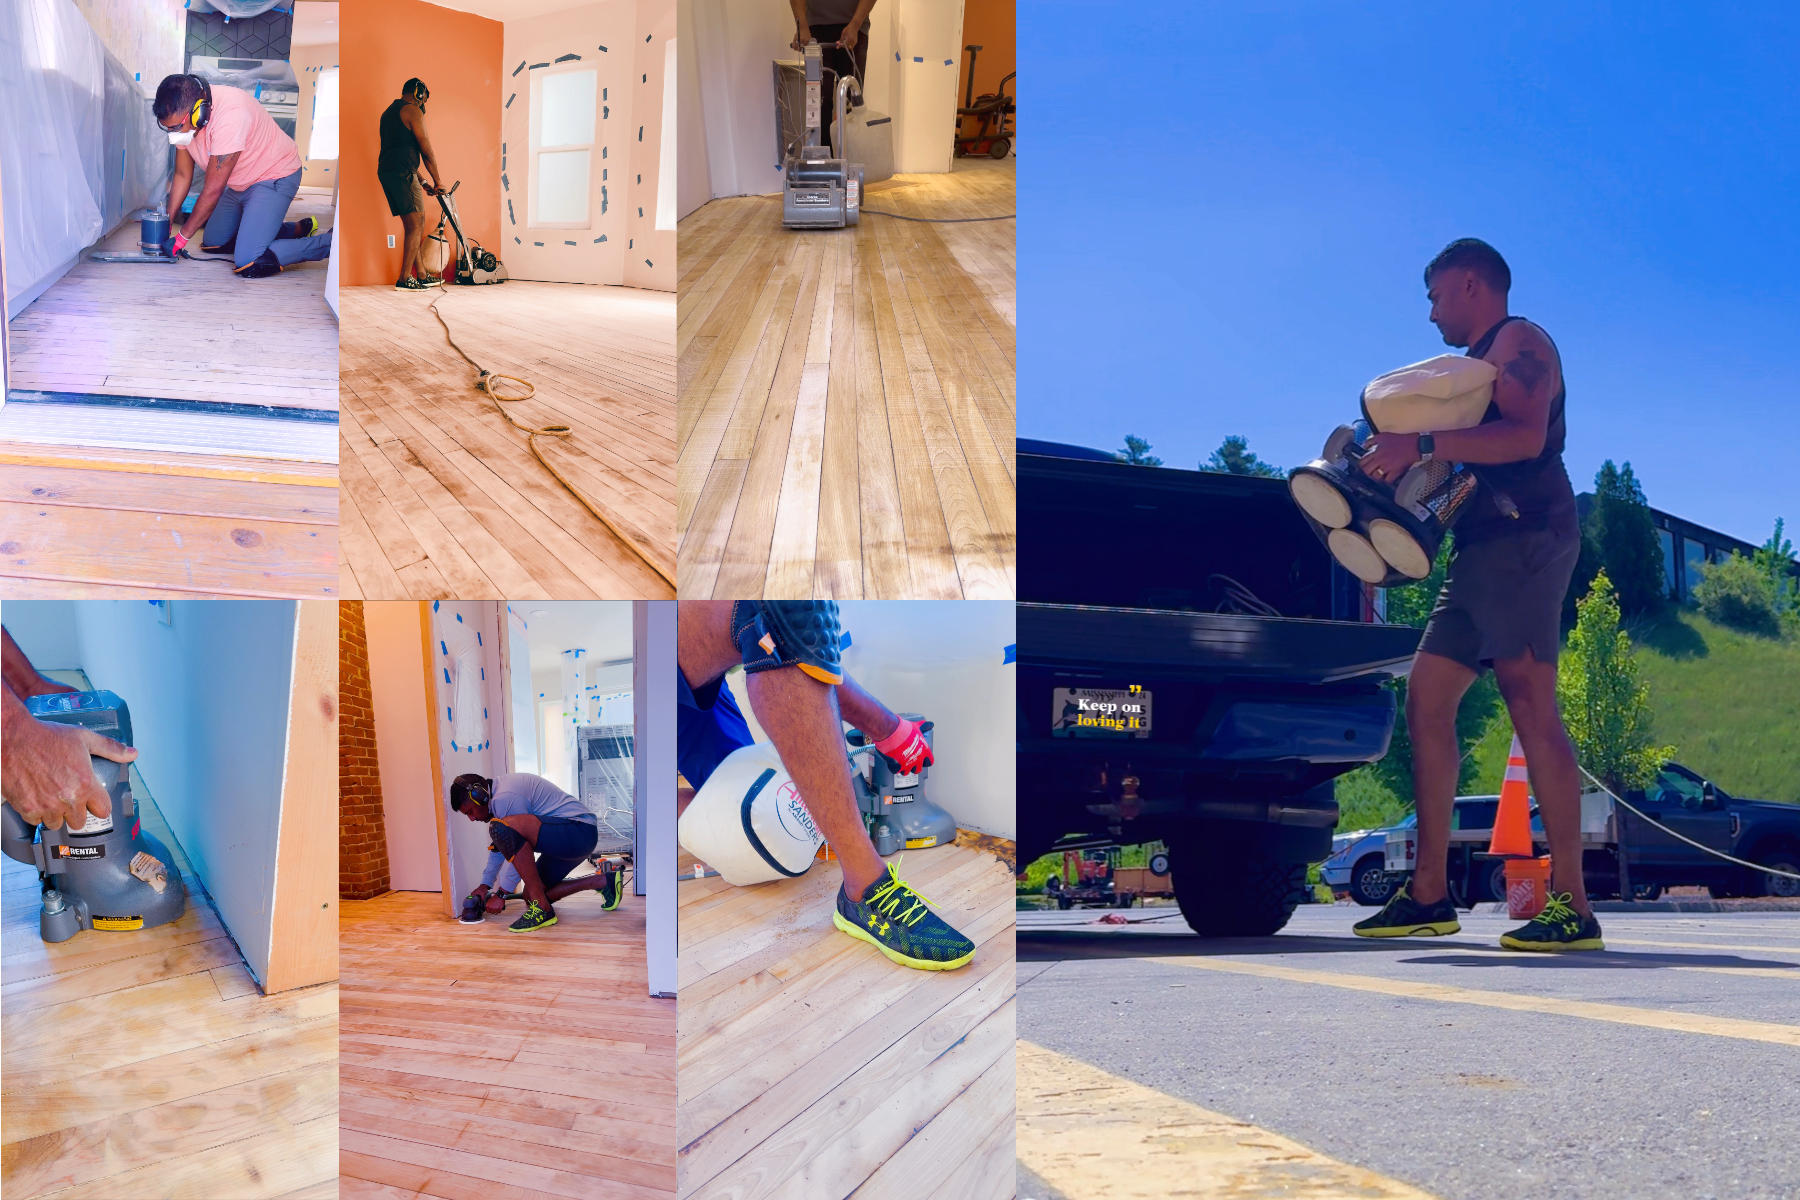
This maple floor had been through decades of neglect, its natural beauty hidden under layers of dirt, old coatings, and time. The transformation began with a rented drum sander from The Home Depot. I worked meticulously through three grits of sandpaper—60, 80, and finally, 100 grit. The hours were long, but with every pass, the original golden hue of the wood began to emerge. It was a moment of pure satisfaction, seeing the character of the wood come alive again.
Attention to Detail: The Edges and Hard-to-Reach Spots
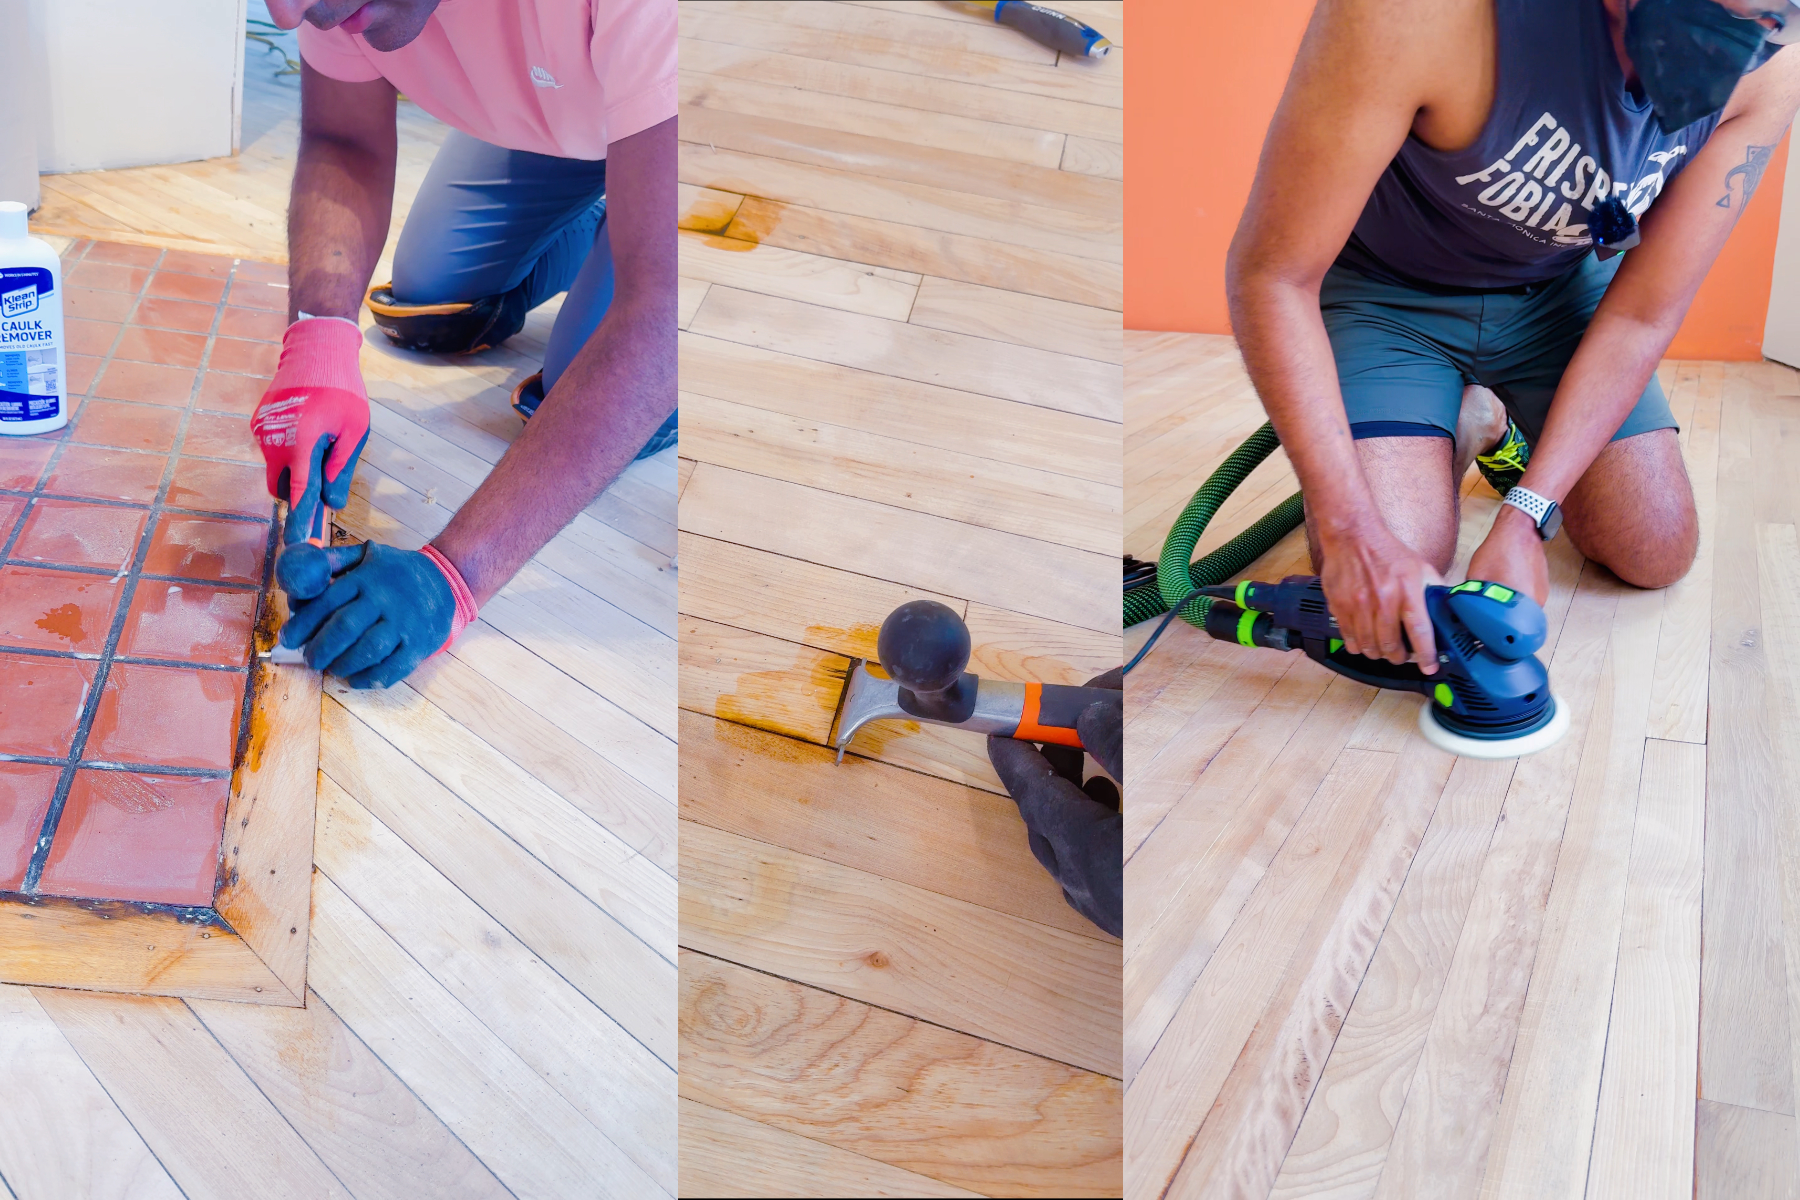
The edges of the room presented their own challenge. For this, I rented an edge sander, also from The Home Depot, which proved to be indispensable in tackling the floor's perimeter. Yet, there were still spots the sanders couldn’t reach. Armed with a scraper, I painstakingly removed stubborn layers of coating and dirt by hand. It was tedious work, but there’s no substitute for a meticulous touch when perfection is the goal.
The Finer Details
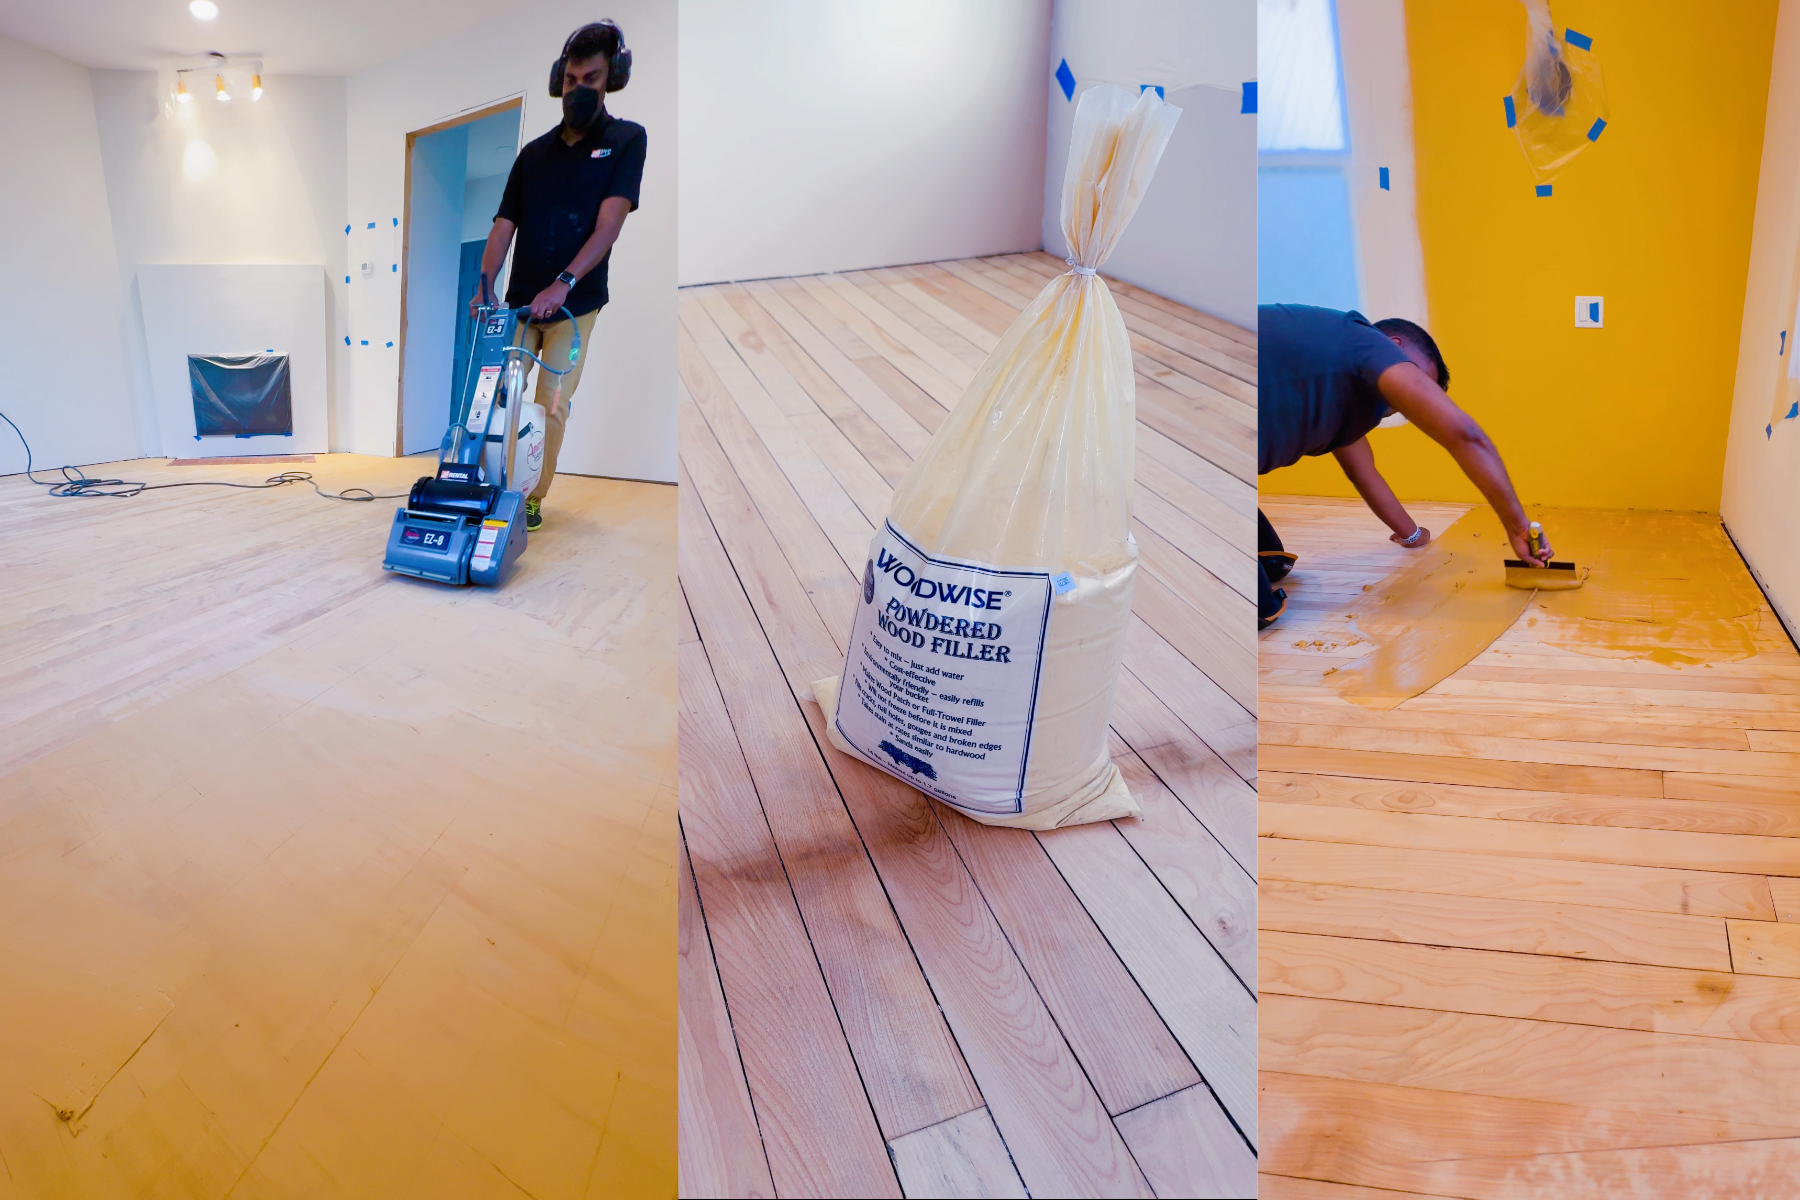
To address areas requiring precision, I turned to my trusty Festool sander for spot cleaning. This tool was a game-changer, ensuring that no imperfection went unnoticed. Next came the Woodwise powdered wood filler—one of my favorites—which I used to fill gaps and create a flawless surface. With that done, it was time to repeat the sanding process to refine the surface further, using the drum sander, edge sander, and orbital sander for a smooth finish.
The Final Touches
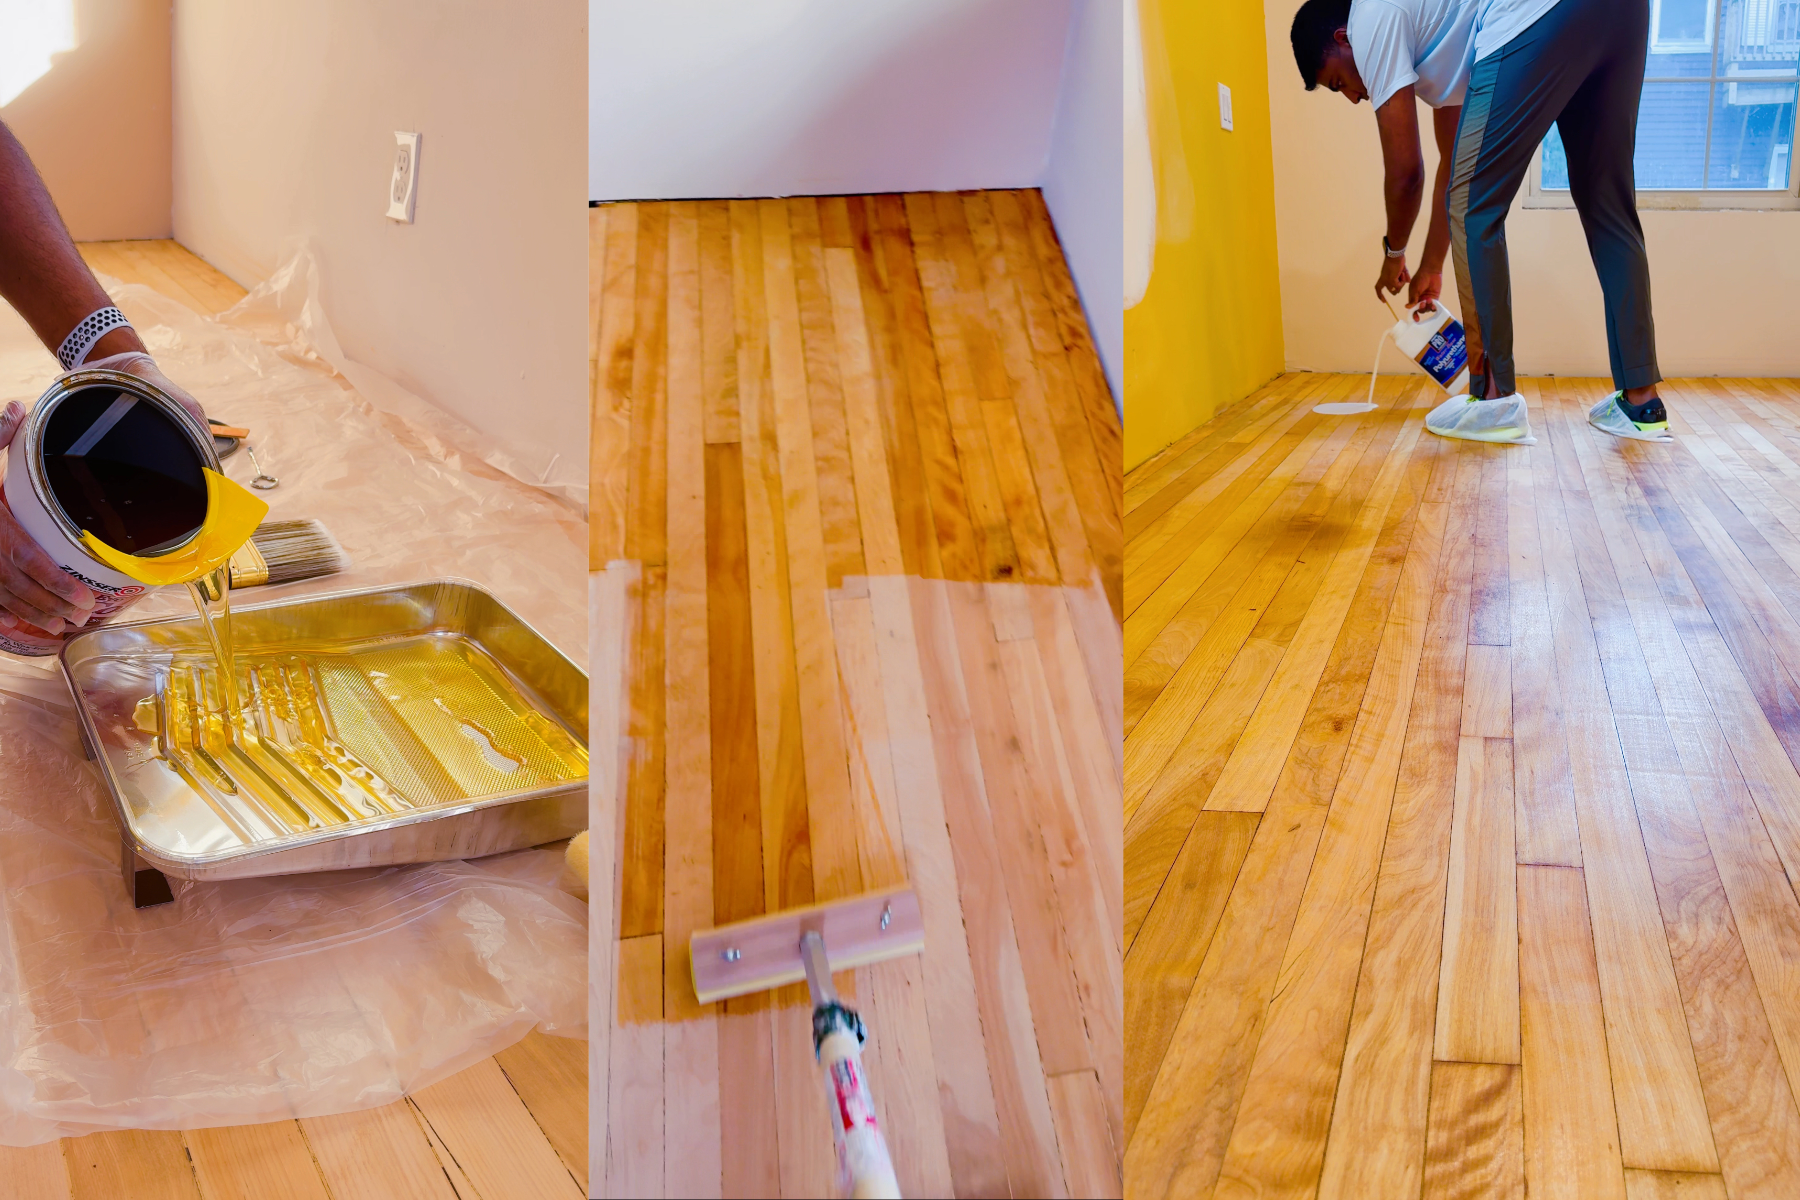
The last step in this labor of love was screen sanding, which ensured an ultra-smooth surface in preparation for the Seal Coat application. Once the seal coat dried, I applied three coats of Parks PRO water-based polyurethane. To ensure the floor achieved its full strength, I kept it unused for 15 days before placing any furniture back onto it. This wait was essential to allow the finish to cure completely and maintain its stunning look.
Why Take on a Project Like This?
Refinishing this floor was more than just a home improvement task. It was a journey into the past, a chance to restore something that time had almost erased. For anyone considering a similar project, know that it’s a challenge, but the rewards are worth it. There’s nothing quite like the satisfaction of uncovering and preserving the beauty of a bygone era.
Interested in DIY projects like this? Book an appointment with Howdiy now!